Cutouts
Cutouts
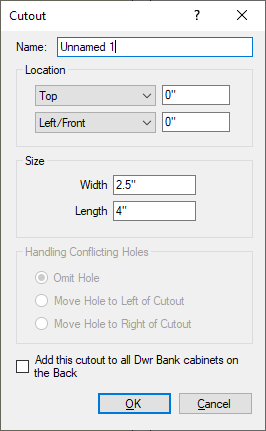
This section displays and allows custom cutouts to be created for the currently displayed part only. A good example of use for creating a custom cutout would be to add a hole to allow wiring through on a Computer Desk. Remember, this only creates a square hole, not a round one.
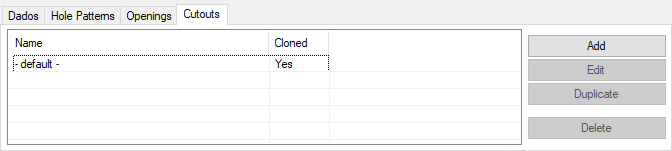
- Name: This section displays cutout names. If the cutout is added on this tab using the methods below, they name will be set to whatever is in the Name field on the custom cutout screen. Cutouts that are created by default from the Options section in the Tools menu will be named "- default -" since there is no way to currently name the default ones.
- Cloned: This section will display a Yes or No depending on if the cutout was cloned on when it was created by either the Cutouts tab in the Options menu or if it was created in this section as a custom cutout.
To create a custom cutout, click on Add on the right hand side. From the window that comes up, this cutout can be created using the options being displayed.
|
|
|
|