Material Types
Material Type
In the Material Type section, specify the materials you will use for each of the cabinet parts. Material types can be specified for entire jobs but you can also change specifications for individual cabinets within a job.
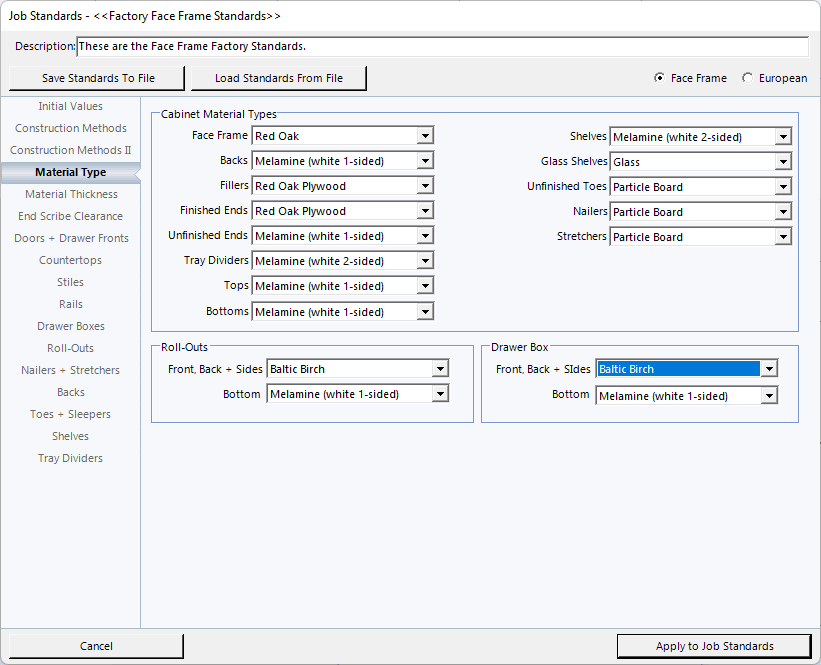
To Choose a Material:
- Click on the down arrow after the name of the material for the cabinet part.
- Use the arrows next to the drop down list to scroll through the list of materials.
- Click on the name of the material you want for the cabinet part.
To Add a Material to the Materials List
To Add or Remove materials from the Material List, click on the TOOLS menu at the top of the screen, then click on EDIT MATERIAL LIST or press the SHIFT key on your keyboard, plus the letter M (Shift+M) to open the Edit Material List window.
To Add a New Material Type: On the Edit Material List, click on Add New Material Type. Another window will appear that has the first material that's on the list on it. Highlight whatever material is in that list and type in the material name you want to add to the list.
NOTE: DO NOT ADD A MATERIAL THICKNESS AS PART OF THE MATERIAL NAME, JUST THE NAME OF THE MATERIAL. THE MATERIAL THICKNESS SECTION OF THE STANDARDS IS WHERE THAT INFO GETS ENTERED. THE THICKNESS GETS ADDED WITH THE MATERIAL TYPES FOR CUT LISTS, ASSEMBLY SHEETS, ETC.
To Remove a Material Type: To remove a material from the list, scroll through the list until the material to be removed is visible and click on it. Then click on Delete Current Material Type to delete that material.
NOTE: THE SOFTWARE WILL NOT REMOVE A MATERIAL THAT IS CURRENTLY IN USE IN THE JOB ON THE SCREEN. IT IS RECOMMENDED TO START A BRAND NEW JOB AND BEFORE YOU ENTER ANY INFORMATION AT ALL, GO AND ADD OR REMOVE MATERIALS AS NEEDED.
ANY TIME A JOB THAT USES A MATERIAL THAT HAS BEEN REMOVED FROM THE SOFTWARE IN THE PAST WILL AUTOMATICALLY ADD THAT MATERIAL BACK ONTO THE LIST.