DXF
DXF
|
|
|
Information displayed here is only when DXF is set in the Export To section. This section sets how the Workshop creates DXF files to be opened in other software outside of EnRoute. The information on this section should not need to be changed once it is set. NOTE: Technical Support may not be able to offer much help when setting this information up. It is recommended to contact Technical Support of the product that will be used with any questions about configuring. Alt Export Directory: This sets a different location for where the files get exported to. Run Program on Export: If selected this is the program that will run when files are Exported. Crop Layer Names to 31 Characters (AutoCAD Compatibility): Some programs may allow for longer layer names, but some may need shorter names. This shortens the layer names to be compatible in AutoCAD. Depth as Negative: Depending on the program being used the depth must be set as a negative value instead a positive. One CSV file per material: By default one CSV (Comma Separated Value) file is created for all materials. This can create a large file. Also not all materials may not need to be exported at the same time. By selecting this option, it creates a separate CSV file per material.
Add Headers to CSV: This will give each column a header file that will have all fields selected at the top to make it easier to read. CSV Columns: These are the columns that will be created on exported to CSV. |

|
|
|
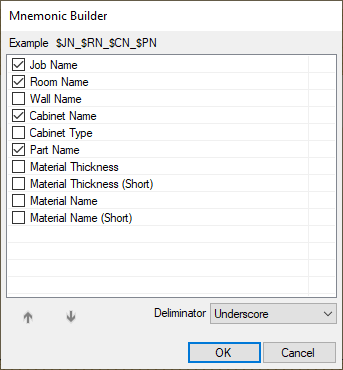
File Naming: This field can be manually edited or generated by clicking on the button next to it with the three dots. When in the Mnemonic Builder, select the name information that is required depending on the program that is being used by putting a check next to the items on the list, then click on OK. That will add them into the File Naming field. |
|
|
|
|
|
|
|
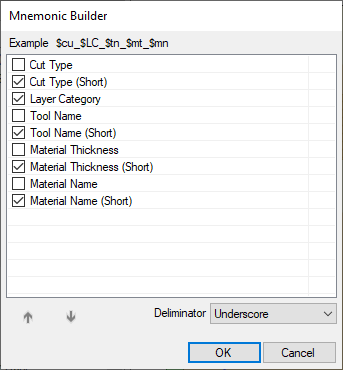
Layer Naming: This field, like File Naming, can be manually edited or generated by clicking on the button next to it with the three dots. When in the Mnemonic Builder, select the layer information that is required depending on the program that is being used by putting a check next to the items on the list, then click on OK. That will add them to the Layer Naming field. |