Add a Plant-On
Add a Plant-On
Adding a plant-on is as easy as clicking your mouse on the check box in front of the label "plant-on". When this box is checked, Cabinet Solutions will put a plant-on on the end specified. However, there are many different styles of plant-ons and many different ways to attach them to the cabinet. To set all this up, Cabinet Solutions has several more dialog boxes that you can access by clicking on the button labeled "Plant-On Properties".
Notice that you can access the properties for both the left and right side of this cabinet. The properties of the left and right side work independently of each other so whatever changes you make to one side be sure to do to the other if you want both sides the same.
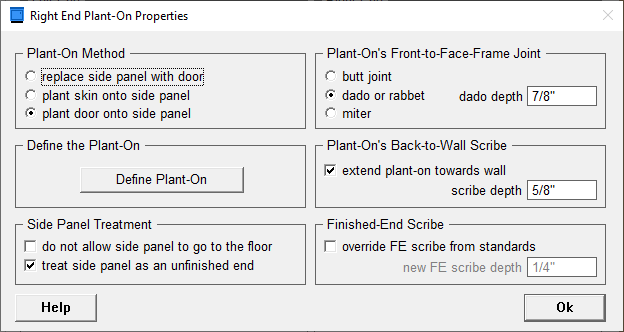
Plant-On Method:
There are 3 ways in which you can add a plant-on in Cabinet Solutions
- Replace Side Panel with Door: Click on this radio button if you want to replace the existing end panel with a door panel of some kind. You can then click on the "Define Plant-On" button below to specify what kind of door you want.
- Plant Skin onto Side Panel: Click on this radio button if you want to place some type of skin (1/4 plywood or laminate) over the existing end panel. You can then click on the "Define Plant-On" button below to specify what type of material you want.
- Plant Door onto Side Panel: Click on this radio button if you want to cover the existing end panel with a door panel of some kind. You can then click on the "Define Plant-On" button below to specify what kind of door you want.
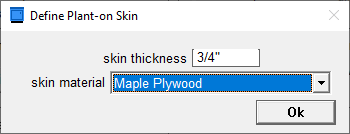
Defining the Plant-On:
By clicking on the "Define Plant-On" button you can open up other dialog boxes that further allow you to define your plant-on. If the plant-on is going to be a door of some kind, you will find the same dialog boxes that are used in the standards for doors. (See Doors and Drawer Fronts for a detailed description of these standards). If you select the option to "Plant Skin onto Side Panel" a dialog box will open for you to select a material and enter in the material thickness.
Side Panel Treatment:
These two check boxes will affect the cabinet's original side panel that is sitting underneath the skin or the door that is being applied to this end.
- Do not allow side panel to go to the floor: If you are sending your stile and/or the end panel of this cabinet to the floor the door or the skin that you are applying will go to the floor too. If you do not want the original side panel to go to the floor as well, check this box.
- Treat side panel as an unfinished end: Most plant-ons are applied to finished ends and in Cabinet Solutions, finished ends extend down to the bottom of the end stile. If your plant-on is a thin skin or laminate the side panel that sits underneath probably needs to continue to extend to the bottom of the stile for support. However, if you are applying a thicker skin or applying a solid door panel to the end, you may want the side panel that sits below to only extend down as far as an unfinished end panel. If so, check this box.
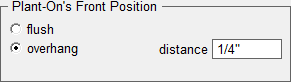
Plant-On's Front-to-Face-Frame Joint or Front Position:
This part of the dialog box allows you to set up how the plant-on will connect to the face-frame or (in Euro) where the front of the plant-on will be positioned in relation to the front of the cabinet.
|
|
|
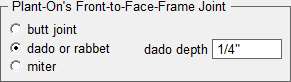
- Butt Joint: The front of the plant-on will sit adjacent to the back side of the frame.
- Dado or Rabbet: The front of the plant-on will sit adjacent to the back side of the frame.
- Miter: The front of the plant-on will be mitered to the frame.
- Flush: The front of the plant-on will align with the front of the rest of the cabinet box.
- Overhang: The front of the plant-on will stick out beyond the front of the rest of the cabinet box. Enter the dimension you want the plant-on to overhang.
Plant-On's Back-to-Wall Scribe:
This part of the dialog box allows you to add an extra dimension to your plant-on for the purposes of cutting off or scribing to the wall. This scribe depth is added to the plant-on overall size or in the case that the plant-on is a door, this dimension is added to the back stile.
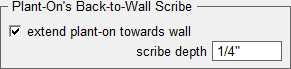
If you check the check box, an additional scribe amount will be added to the plant-on. Enter the additional amount in the edit field labeled scribe depth.
Finished-End Scribe:
This part of the dialog box allows you to override the standards for finished end scribe you set-up in Job Standards. Remember, end scribe is the amount that the face frame overhangs the end of the cabinet. This information appears in the assembly sheets so that the face-frame can be place on the cabinet box correctly.
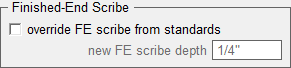
Check the box if you want to override the scribe set in the Job Standards. Enter the new scribe size in the edit field provided.
- Click on the Done button when you've finished with the "Plant-On Properties" dialog box.
- Click on Accept or Cancel to leave the "Modify Ends of Cabinets" dialog box.