Options
Options
The Options selection provides you with many commands and features. The different sections are General, Units & Conversion, Display, Printing, and Color.
|
|
|
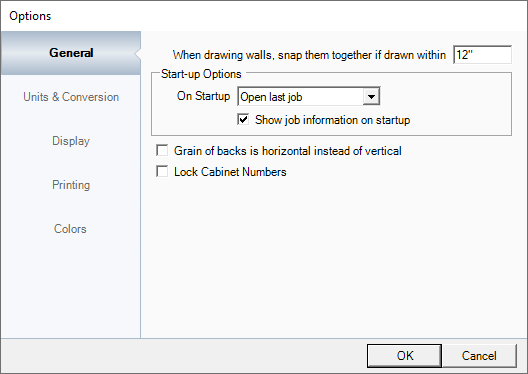
When drawing walls, snap them together if drawn within _______: This items controls when to snap the walls together. Each grid square on the Draw Walls screen is 12" by 12". By default, if you draw the ends of 2 walls within the set distance, the program will snap the corners together. NOTE: This value should never be 0" or the walls will never snap together. Start Up Options: When Cabinet Solutions first opens, this tells the program what to display. The options are: Prompt to Open Last Job, Open Last Job, Show Open Dialog, or Start New Job. By default Cabinet Solutions will open the last job without prompting. Show Job Information on Startup: This option determines if the Job Information window will be displayed when opening the Designer. Grain of backs is horizontal instead of vertical: Some situations require rotating the grain direction of the backs from a vertical grain to horizontal. NOTE: This change will affect the entire job, not just certain cabinets. Lock Cabinet Numbers: By default, cabinet numbers are locked so when they are moved from wall to wall, the cut list information and assembly sheets always match up. Cabinet numbers can end up all jumbled up and scattered on Floor Plans. If you uncheck this option and apply it to the job, all of the cabinets will re-number starting from the first room, and the cabinet that is in the top left most corner of the drawing. If you decide to unlock the cabinet numbers to renumber the job, it is highly recommended to lock the numbers back afterwards. The reason being is every time you place a cabinet or move a cabinet, the entire job will re-number and any assembly sheets or cut list information will no longer be useful. There is another option in the Tools menu to renumber the cabinets. It does almost the same feature as this one, except it will leave the cabinet numbers locked when it is done re-numbering them. |
|
|
|
|
|
|
|
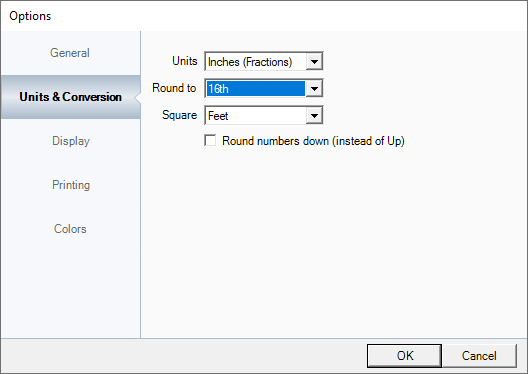
Units: This sets the units that the program is set to display. Round To: Displays what the Designer should round to. The options are 16th, 32nd, or 64th. Square: This will give measurements in either square feet or square meters. NOTE: Metric and Inches can be used anywhere by entering in the inch symbol of " or metric by typing in mm after the number. Round numbers down (instead of Up): This will round uneven measurements down to the nearest option set in the Round To, or Up depending on if this is checked or unchecked. |
|
|
|
|
|
|
|
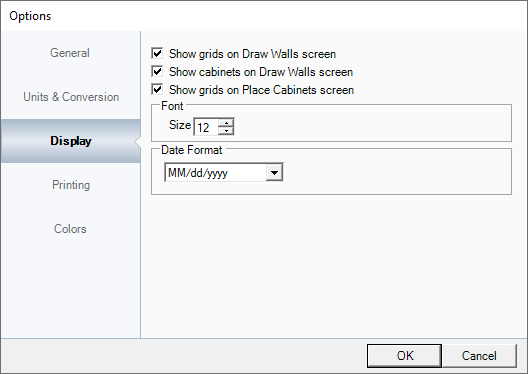
Display Options: In this section, it is determined which items get displayed where, Show Grids on Draw Walls screen, or the Place Cabinets screen or even to Display Cabinets on the Draw Walls screen. This is also where the general font size of the program is set. The Date Format section displays how the date is shown on printouts. |
|
|
|
|
|
|
|
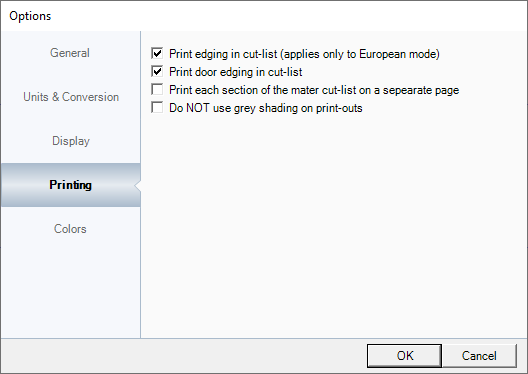
Print edging in cut-list (applies on to European mode): Since edging of the sides of parts (not just doors) is a Euro standard, this option determines if the edging gets added to the Master Cut-List printouts. Print door edging in cut-list: Slab doors can have edging added to them in the Standards section for doors. This option will either include edging or not in the Master Cut-List printouts. Print each section of the master cut-list on a separate page: By default, the Master Cut-List displays everything grouped together to fit on as few pages as possible. With this option set, the printouts will break in between each section. Do NOT use gray shading on print-outs: This option turns off gray shading on printouts. |
|
|
|
|
|
|
|
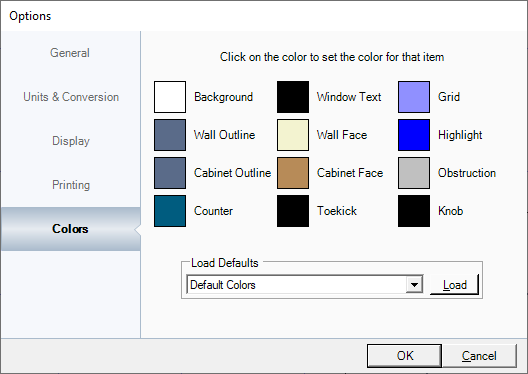
This section sets the default color of each item in the software. This includes the Draw Walls, Place Cabinets, Elevations screens and, how items look on printouts (except prints done from the Tour). There is no way to save a personal preference, however once the colors are changed, they stay that way until they are changed again. |
|
|
|
|
|
|
|
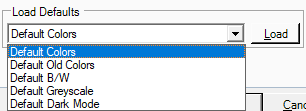
Load Defaults: These are the defaults that are included in with the Designer. If a default item on this list is selected, please remember to click on Load to load that item and force the screen that is being looked at to refresh in order for the change to display. The refresh can be either going to a different section or zooming in/out of the window. |
|
|
|
|
|
|
|
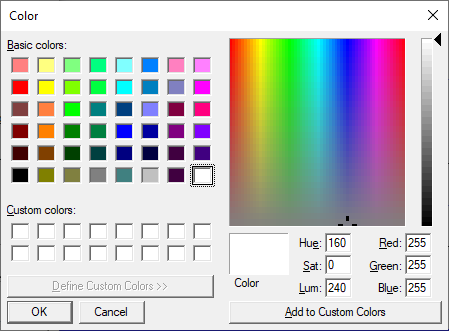
When selecting new colors for the Designer, this is the window that is used. It includes basic colors or new ones can be added by entering in their Red/Green/Blue values to create more personalized colors that can be saved by clicking on Add to Custom Colors. |